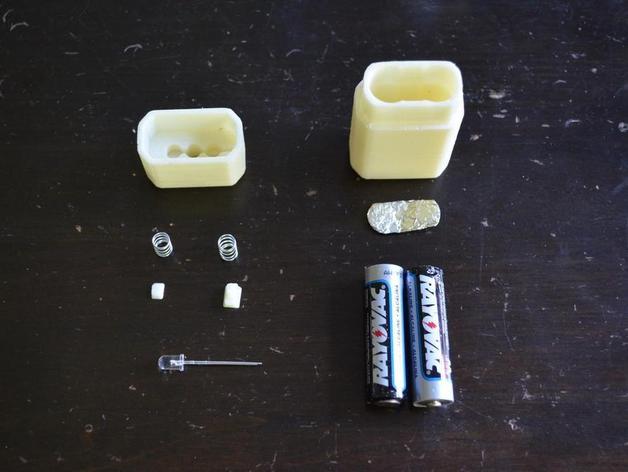
My 8 year old daughter asked me to print her a flashlight using glow-in-the-dark ABS. I decided to try to do a super simple LED version which would require as few non-printable parts as possible... Seemed to come out reasonably OK and will hopefully be durable too!Print the parts - I did mine in glow in the dark ABS on my TOM with 25% infill. Try fitting the cap onto the battery case -- it should be a tight fit, but not so tight that it can't be opened. You may need to file or sand the parts to get the right fit.You'll need the following non printable parts: 5mm white 3.3v LED (Radio Shack in the US carries them - 2 for $2.50), 2 conductive metal springs approx 6mm in diameter and 20mm long (I got mine from an assortment box I had lying around -- ideally they will fit tightly into the two holes as in the pictures), a bit of aluminum foil folded a few times, 2 AA batteries. (Pic 1)Fit the LED into the center hole of the flashlight cap and carefully clip the shorter wire so it folds down neatly into the hole that does NOT have the long slot that pierces the side of the cap. Place one of the springs in the hole on top of the wire so that it contacts it firmly. (Pic 2)File or sand the larger switch piece down slightly so it will fit into the slot of the cap from the inside and then be able to slide up and down without much force, but still enough friction so it stays in place. (In the picture my switch piece is red)This is the tricky part; carefully clip the longer wire so that it's just long enough to fit into the tiny hole in the bottom of the switch when the switch is fit into the slot. The hole should be "down", i.e. closer to the very top of the cap. Now slide the switch all the way to the bottom -- the wire should lie in the channel below where the second spring will go so that it is not in contact with the spring. You may need to use a small screwdriver or something to get the wire to lie flat. You should probably start with the wire being too long and then clip it shorter and shorter until it fits properly. Make sure that the switch can slide up and down, moving the wire with it. (Pics 3-5)Using some superglue, glue the tiny remaining tab into the top of the switch slot which will both limit the movement of the switch and prevent the switch itself from coming out. (Pic 6-7)Put the second spring into the hole over the wire channel.Trim the folded foil so that it fits into the bottom of the battery case and push it down to the bottom, lying flat.Put the batteries in with the plus and minus poles in opposite directionsIf all is well, the LED should turn on and off with the switch!
- 0 inches x 0 inches x 0 inches
- this product is 3D printed
- 16 available colors
- material is a strong plastic
- free delivery by May 02
- 0 parts