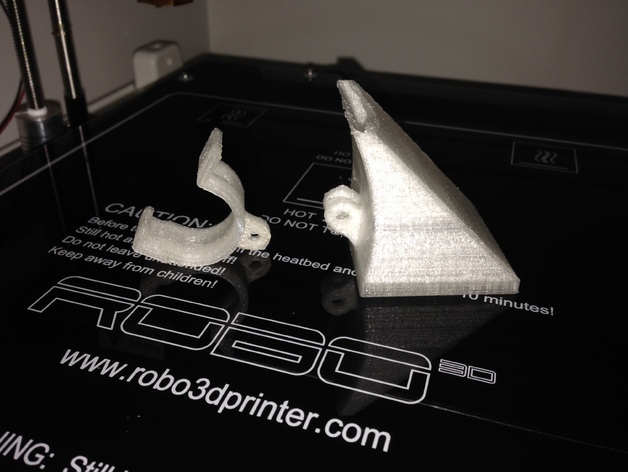
EDIT: please see the newer revised edition here that is suitable for the Hexagon hotend. http://www.thingiverse.com/thing:431160 During my 3D printing learning curve I found the requirement for ducted fan to achieve better prints and to successfully bridge. Since the Robo3D there wasn't any suitable fan ducts available on Thingiverse so I decided to try my hand at 3D CAD and design one, needless to say yet another steep learning curve. This is my first design and I wanted to share it as I feel the bracket is a great solid fit for the Robo3D and I want it to help spawn some great fan ducts for the Robo. This duct fits with the E3D v5 nicely. To fit the standard hotend some tweaking is required (I had to file the duct bracket holes downwards a bit and some off the top of the duct brackets so the duct could mount to the X carriage bracket a bit higher, some users have heated the top of the duct and pushed the mounting point downwards). I hope you find this useful and that it assists in producing other/better fan ducts for the Robo3D.Printed in PLA at 0.3 mm with 2 perimeters, 2 layers top/bottom, 25% infill. My fan duct print had some issues before it finished so it's about 5mm shorter than the design. Print the bracket on its side with support. Print the duct on the fan attachment end with no support. Drill the 4 duct fan mounting holes out with a 2.5mm drill bit. Do some test fits if mounting with the stock hotend. The X carriage bracket mounts on either side of the X carriage. Unbolt the stock fan and it's bracket then slide the bolt hole end of the new bracket on to the X carriage first then clip the bracket to the outside of the X carriage. The bracket will flex a little. Test fit the fan duct and make sure you have 2 or 3 mm clearance when the hot end is Z calibrated to the bed so you can slightly tilt it down towards the nozzle. Once fitted attach the fan with the stock bolts, you'll need to drill out the 4 fan mounting holes with a 2.5mm bit for the stock bolts to simply screw in. Then mount the duct to the bracket and check it's height and you're ready to do a test print.