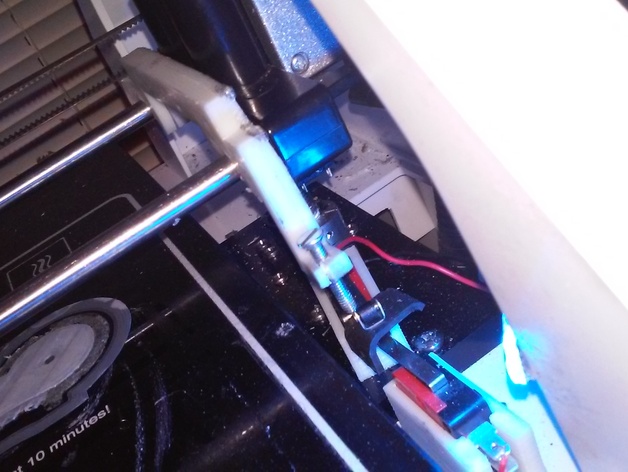
I've had nothing but trouble from the auto-level and z-limit switches since I first plugged my Robo3D in two weeks ago. The very first movement it made was to home the z-axis and when it attempted this seemingly simple tast, the wiring of one of the switches failed causing the nut that raises everything to drop out of the z axis bracket and commence to wrap up and make sure the wiring to the rest of the limit switches up top was also faulty. I took a model of the extruder carriage(I'm pretty sure it was leonmf's work I borrowed at http://www.thingiverse.com/thing:192639, I'm not sure exactly but that looks familiar) and modified it to only be 10mm or so thick(no measurements just fitting it with a model of the Robo3D I have and moving things around until it fits). I also added a leg with a foot that will take a #8 machine screw(you may have to apply a little heat or clean the hold with an appropriate bit size to keep the ABS around the screw hole from cracking). I unplugged the wires to the existing z-limit switches an connected them to an Omron V-156-1C25 I had in the spare components bin. After making the connection, I placed the switch into the limit switch holder. After printing the x-carriage-z-stop and installing it on the x-axis rails, i placed the limit switch and holder directly under the foot of the x-carriage-z-stop and aligned the arm of the switch with the hole in the foot just past the switch underneath the arm so that mechanical advantage would work in our favor and this leverage could be adjusted to allow the light weight of the x-axis and extruder-carriage to trip these heavier duty switches without needing to add weight to get them to trip. There is a very small hole in the bottom of the limit switch model but doesn't print well at that size so instead of drilling a new hole for a screw, I simply applied some Elmer's Multi-Purpose Spray Adhesive to the back of the holder and voila! Next, I ran the #8 machine screw through the hole in the foot and adjusted until z homes properly. I also changed the Slicer Settings->Custom G-Code, to disable the autolevel function completely, to the following: ;G-CODE BEGIN G28 ; home all axes G1 Z5 F5000 ; lift nozzle M109 S220 ; set the extruder temp and wait G28 Z0 ; Home Z again in case there was filament on nozzle M565 Z0 ;G29 ; probe the bed G1 Z-3.2 ; nozzle offset G92 Z0 ; set new Z home ;G-CODE END Notice I've commented out the G29 command to probe the bed This is the command to initiate the autolevel sequence that has come to give me such heartburn and nightmares! The G1 Z-3.2(that's a negative 3.2) is an offset you can play around with to get your nozzle closer or farther from the bed at the start of a print. Mine is set to a -3.2 is because without it and using the auto-level feature, my extrudes would always start to high above the bed. You may also notice that I've got two limit switches basically stack. I did this for testing sake and to make sure everything worked before I printed the other x-carriage-z-stop for x home side. It turned out to work so well I've just left it like that.
- 0 inches x 0 inches x 0 inches
- this product is 3D printed
- 16 available colors
- material is a strong plastic
- free delivery by May 03
- 0 parts