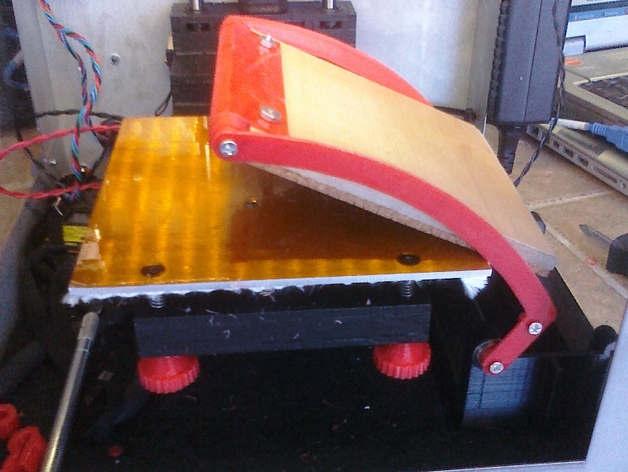
Bring the heated bed of your Solidoodle up to temperature twice as fast with these parts, some sheet cork, and a little plywood or mdf. Cork has good insulating properties and is relatively heat resistant. This mechanism is designed to auto-retract, meaning that you can leave it unattended on the lowered bed and it will flip safely out of the way when the bed raises up to print.1) Print out the carriage, two curved support arms, three cross rods, and bed attachment collar.2) Clean all pieces, paying particular attention to make at least two of the rods smooth and round. I did this by gripping them with sandpaper after chucking them into a spinning drill.3) Cut a sheet of mdf or thin plywood to 120mm x 130mm. I used some leftover floor laminate. 4) Drill and countersink two holes in the 1/4" plywood or mdf and attach one of its shorter sides to the bed attachment collar using screws, nuts, and the printed holes. The screws should go in the countersunk side first and then through the collar and nut.5) Glue cork sheet onto the plywood or MDF, covering the screw heads. I used two layers of 1/8" cork and contact cement.6) Slide one of the smooth rods through the holes in the bottom carriage, and the other through the attachment collar. 7) Following the layout in the photos, connect the two arms together so that they are parallel to each other using the three rods and six small screws. The bed attachment collar goes on the end of the long sections of the arm, while the rod going through the carriage goes on the other end.8) Test fit the assembly to the bottom right corner of the Solidoodle case, carefully sliding the case edge into the slot in the back of the carriage. Make sure it is properly aligned to the bed and is clear of the extruder when the latter is in the home position The rounded support arms are designed to slide along the corner of the bed as it raises up from the rest position, so make sure the near one is not too close to the front edge of the bed.9) Affix the carriage to the case to keep it from being lifted up by the bed. You can use hot melt glue or with screws and nuts after punching holes in the solidoodle frame that match the mounting holes in the carriage.10) To use the cover, home the print head and lower the bed to near its bottommost position. Flip the bed cover down onto the bed. When the bed raises to print, it pushes the cover up and over. About halfway up the cover's center of gravity will pass over the pivot in the carriage, causing the bed to flip completely out of the way.11) To be useful, you probably want to add starting gcode in your slicing app that will pause a print until the bed has reached a particular temperature. Once this is done, you can just lower the bed, put on the cover, and start a print job. Once the bed warms up, the cover will flip out of the way when the bed raises up to begin extruding.
- 0 inches x 0 inches x 0 inches
- this product is 3D printed
- 16 available colors
- material is a strong plastic
- free delivery by May 03
- 0 parts

