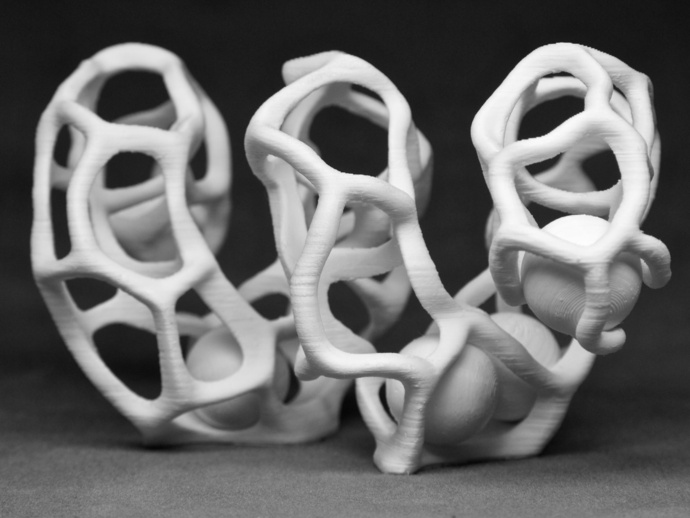
I started with a basic helix in ZBrush and then removed as much material as possible in a way that I could still have a passage for the balls. It turned out to be a challenge: maintaining the organic look while making sure the balls would either not get stuck or not fall out. For these things, I like to use the artistic side of my brain rather than the engineering side which would have calculated the detailed clearances needed for the balls but would have ignored the visual and tactile aspects of the design. I also really love achieving "flow" while designing in ZBrush, something that would be hard for me to do in an engineering CAD tool. All that said, this design is not perfect. Once the support structure is removed, it will need some sanding and filing to get the balls to move smoothly through the helix. But it will be worth the effort! Update 8/31/13: I've added a decimated version of the STL file that is much smaller in case you have trouble dealing with the original large file. Note that the surface might not be as smooth.I used ReplicatorG to prepare the file, a MakerBot Replicator2 with the Replicator 2 slicing defaults and the following settings with white MakerBot PLA to do the printing: Infill = 10% Layer Height = 0.200 Shells = 1 Feedrate = 40 Travel Feed = 55 Temperature = 220 I used a raft with full support. It took over 15 hours to print with a height of 75 mm. Then it took several more hours to remove the support structure. Be patient and careful while doing this as the design is complex. As noted in the description section, you will also need to do some sanding and filing to get the balls to roll freely.
- 0 inches x 0 inches x 0 inches
- this product is 3D printed
- 16 available colors
- material is a strong plastic
- free delivery by Dec 18
- 0 parts