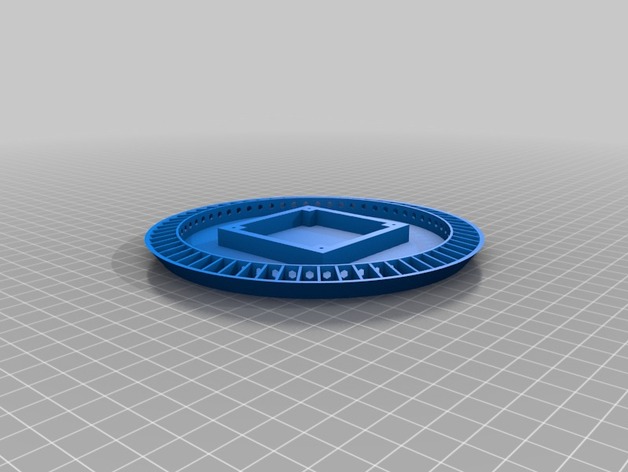
This is my Eclipse Clock body. Link to video: http://www.youtube.com/watch?v=j0Z_QiA_onI There are a whole lot of other parts and processes required, but this is the key to it all... Plus it is a BIG introduction to Charlieplexing LEDs.This Eclipse Clock is an awesome Thing.It is designed to take sixty 3mm LEDs, inserted outward through the holes. Wire them up with either: five WS2803 chips, or a Charlieplexing network.Add in an Arduino or clone, a Real-Time Clock module, and attach it to a slab of wood, colored plexi, or some other solid object.Attached are: The Eclipse Clock body, a Charlieplex network diagramCharlieplexing is a very interesting concept, designed to run many LEDs on just a few Arduino pins base on the formula: #LEDs = #pins (#pins-1) (in this case, I needed 60 LEDs, 72 = 9 8 - I had to do 9 pins, because 8 pins would only run 56 LEDs).Unfortunately, I can not provide the code for this, as some of my code is proprietary for other patent-pending products I am working on. To get a basic version of this running really isn't much more than 200 lines of code, including visual alert routines, a time-set mode, and interfacing with a Clock module.I am selling arduino clones, pre-programmed, with instructions on how to assemble, as well as full kits, including LED's, clock module, Arduino clone, wire, and a rotary encoder. Just PM me.Not only will this be the coolest clock around, but if you use a Chronodot real-time clock module, it'll also be the most accurate.Edit: I uploaded a video of this clock in action. Enjoy!Update: Redesigned with OpenSCAD. The fins print properly now. I also make a back cover/Hole template. This cover offers room for an small arduino/clone (pro-mini, etc), and holes for marking/drilling as well as installing a power plug and Rotary Encoder.