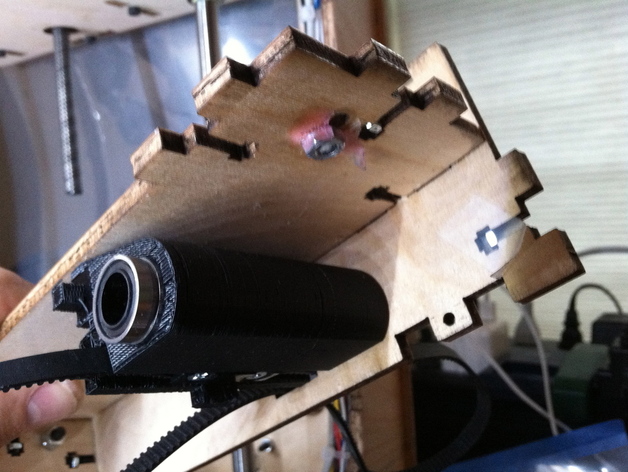
When changed over to linear bearings in my X stage carriage (Thing:14747) I wanted to do the same for my Y stage. I've designed this thing to replace the drive rib on the Y stage.The holder was printed on a TOM with a MK6+ on a heated build platform. My settings were: Object infill% 35, Layer height(mm) .32, Number of shells 0, feedrate (mm/s) 32 raft checked - full support. The belt block settings were: Object infill% 100, Layer height(mm) .27, Number of shells 0, feedrate (mm/s) 32 no raft - no support.I've designed this thing to replace the drive rib on the Y stage. Print both parts and clean up the mess on the holder, spend some time cleaning up the slots on the rib with an exacto. Press the bearings in until they are flush with edge of the protruding tabs, they don't get pressed in all the way, you want them protruding the stage sides (see photo). Use a rod from the Y stage to check the alignment of the bearings. The hardest part of this project is tearing apart the whole Y stage, lots of screws! Remove the rib and take the belt out. Replace the belt and use the bearing block and two 3X20mm countersink screws and nuts to pinch the belt on the holder. Reassemble the Y stage.
- 0 inches x 0 inches x 0 inches
- this product is 3D printed
- 16 available colors
- material is a strong plastic
- free delivery by May 02
- 0 parts