Like many Thing-O-Matic owners, I ran into many problems with the automated build platform and eventually replaced it with the simple heated build platform. I printed that way for most of a year, but I finally decided to revisit the ABP and see if its problems were fixable. Thanks to many Thingiverse users' contributions, I have finally found a combination of fixes that works!With the modifications described here, I now have the ability to quickly switch the ABP and HBP on my TOM, with no need to change any home offsets or Gcode. The belt is now evenly tensioned, free of wrinkles and holds down to the build platform well. Also, since both platforms are removable, maintaining them is much easier.Most of the design work here is due to others, but one key fix I discovered involves modifying the rollers. Read on for the details.Most of these upgrades are printable, so remember to print out all the parts in the list below before you disassemble your platform.1) Replace the X-carriage with the Quick Change Build Platform for TOM by tomlombardi. The idler mod version is the best, and the small bearings can be found at hobby shops, as they're used in RC helicopters. 2) Build both a HBP and an ABP on top of tomlombardi's printed pieces. You'll need an extra heater board. You'll also need two aluminum counter-sunk build platforms (one for each). File the sharp edges off the aluminum for the ABP so the belt doesn't get worn out by the burrs. 3) Attach the ToM APB Belt Tensioner by gaerisl to the ABP. I found it helpful to file down the acrylic a little so the axle wouldn't catch as the system is tensioned. I didn't find bearings to be necessary. I also sanded down the part that contacts the X-min switch, to reduce interference and make sure I had as much X-travel as possible. 4) Make a Paper/Kapton ABP Conveyor Belt by AVataRR, about a quarter-inch longer than the stock belt. Mine is 290mm in circumference. I've tried plastic, steel, kevlar and I can say with confidence that the paper/kapton solution is the best. I use the cover of a stapled magazine for the paper because it's thin, strong and with the front and back covers being one piece, it's large enough to make a one-piece belt. It's also much easier with 120mm wide kapton tape.5) Fix the rollers: this is my big value added. Sand off the tabs that slot into the rollers. Sand generously because the rollers are going to get larger. Cut some more of the tubing to fill in the gap in the rollers. Crown the rollers by wrapping 3/4" kapton tape around them at an angle. First layer should cover the central 2/3 of the roller, next layer should cover the central 1/3. Having the middle of the roller thicker helps center the belt automatically: http://woodgears.ca/bandsaw/crowned_pulleys.html. It also tensions the center properly, making up for the fact that the rollers bow in under load. Even tension is the secret to keeping the belt from wrinkling. 6) Assemble the belt onto the ABP and tension it up. Plug it into your machine so you can advance the belt. Run it forward for at least a minute at a time and inspect it. If wrinkles start to form, it usually means the tension is not equal across the span. Push on the belt where it comes off a roller to see where it is tighter and looser. Adjust the crowning of the roller and retest until tension is even and belt doesn't wrinkle. If the belt wanders to one side, tighten that side or loosen the other.7) Attach an ABP wire clip by tomlombardi to control the wires. I use the screw that's closer to the bearing rods.8) Put three thicknesses of kapton tape in a narrow landing strip along the -X side of the ABP, just outside of where the belt runs. This is where the nozzle will wipe the first extrusion.9) Attach a TOM Z-min Endstop to your Z-stage. This allows much more accurate Z-height calibration that is independent of temperature/humidity, but also allows you to switch between the HBP and ABP without changing any offsets.10) Get a Gen4 interface kit, or similar LCD command module. Install Jetty Accelerated Firmware. These go together like a hand in a glove and are by themselves more useful than everything else here. This will allow, among many other useful functions, to advance the belt as desired and to print several copies of an object consecutively. Acceleration is still somewhat beta, but you can always print in unaccelerated mode, which prints exactly like the old firmware.11) Use the supplied start and end Gcodes in place of the defaults. The home offsets I use are X = -54.5, Y = -58.0, Z = -0.85. The dimensions are tight, so you may have to make small adjustments to start.gcode. The main thing is that the platform moves over far enough that the nozzle can drop below it on the side and allow the Z-min endstop to touch. Use the ABP driver in RepG, even when you switch to the HBP (it won't hurt anything). Enjoy your Thing-O-Matic repeatedly printing without human intervention, just like you always imagined!
- 0 inches x 0 inches x 0 inches
- this product is 3D printed
- 16 available colors
- material is a strong plastic
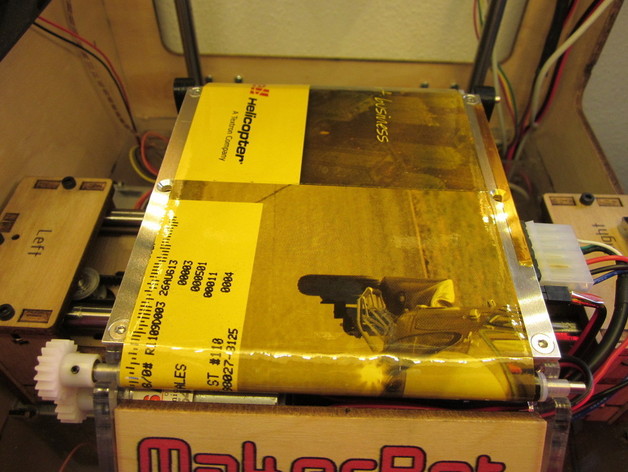
- free delivery by May 03
- 0 parts