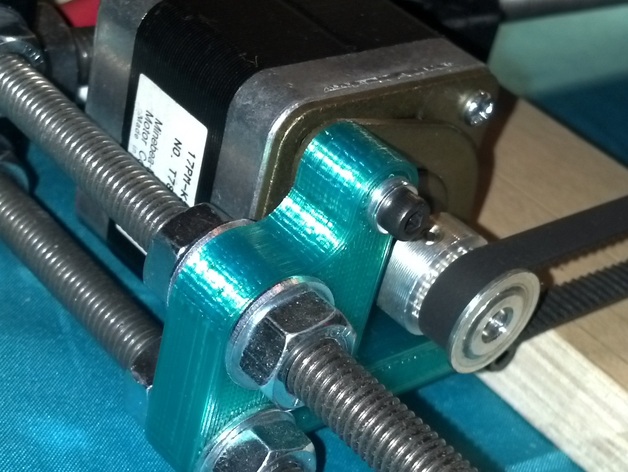
Y-axis motor bracket for dampener (printed for the Prusa i3, but could probably work with other models) When I first received my motors for the RepRap Prusa i3 I was building, they came with this wierd metal/rubber plate attached to the top. Not knowing what it was, I removed the plate and attached the motors to my original brackets (which required their removal anyways). Later, I found out these plates were dampeners, used to cut down on vibration and noise. My x-axis was easy to install the dampener with the original bracket, but my y-axis bracket could not hold both the dampener and the motor, thus, this new bracket was born!Printed on my Prusa i3 for my Prusa i3 .25 layer height 3 perimeters and .5 density hex infill -- for strength 2 mm brim -- to aid in keeping corner from peeling off the bed Should print fine, but make sure the screw insets are on top of the print because it'll have a hard time printing with those on the bottom. You will have to flip the print 180 degrees to achieve this. Expand the pictures to get the best instructions! The pictures should explain well enough how to install this bracket. One thing to note is that the screw insets are on the wrong side. So, the screw-head will sit on the opposite side of the inset, but this doesn't affect anything. Make sure the screws connecting the dampener to the motor are tight, and the screws connecting the bracket to the dampener don't go far enough to touch the motor -- the dampener needs to be the only thing between the motor and the bracket -- the motor should not touch the bracket in any way besides through the dampener. I had to used stacked washers in order to achieve this given my set of bolts at hand.
- 0 inches x 0 inches x 0 inches
- this product is 3D printed
- 16 available colors
- material is a strong plastic
- free delivery by May 01
- 0 parts