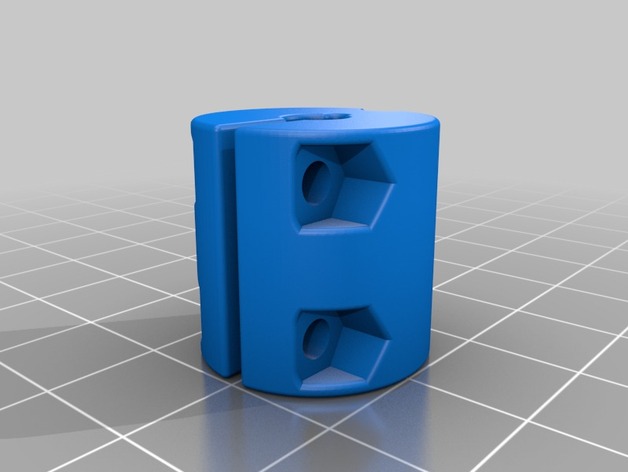
I always want to try to mount my Prusa i3 Z axis upside down, mostly due my version is boxed and is terribly difficult to change the NEMA's Z motors. And so... There it is, my new Z Up2Down system, with sigle or dual anti-wobble, z couplers and it works! I'm open to modifications, and is suitable for Prusa i3 sigle plate and stabilized versions, both in 6mm versions, with 8mm smooth rods and 5mm threaded rods. It requires 2 additional holes per side in the plates, but is optional (indeed very recomended). Depending on your Prusa i3 flavour, the 8mm smooth rod and the 5mm threaded rod could result a little shorter. My friend resolved it making 2 additional holes in the plate to fix the down side in the plate.Print at least @0.2mm layer and 70% infill, minimum 3 perimeters. If sliced with Slic3r v1.2.1, use the XYSizeCompensation using the formula: XYCompensation = NozzleDiameter / 2 So if u have a 0.35mm Nozzle Diameter, then the compensation will be 0.175mm. That's due to Slic3r calculation that trace the filament in his center, not withinn his diameter once extruded (not true, but believe me, is quite needed). For the top motor holder, there are 2 versions. One with a tower that will carry the BallBearing to maximize the anti-wobbling system and the other without it. Print the first one ONLY if u are a lucky owner of a dual extrusion systemand of some PVA filament. Is quite difficult to print using support without PVA. BOM: 2/4x BB625ZZ (id 5mm - od16mm - ht 5mm) 6x 3x10 bolts 6x 3mm nuts 10/12x 3x25 bolts 10/12x 3mm nuts