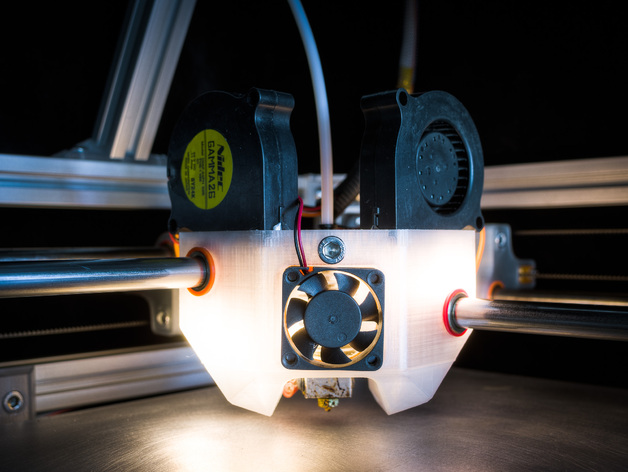
This is an experimental extruder design that may be compatible with some Eustathios printers (I'm using Eric Lien's Eustathios v2 Spyder variant). This extruder is designed to switch between bowden, direct drive Gear Head, and direct drive Bondtech using the linked extruder parts. I may redesign it once I have a better idea which configurations I prefer. The main differences with this extruder are the following: See the instructions tab for more info on assembly and parts required.E3D v6 The E3D v6 is held in place with a M5x30mm screw and an optional M3x40mm screw. The tolerances on the slot for the E3D is tight, and will probably require some light sanding to get a good fit. Bushings I'm using 10x14x30mm graphite bushings with a NinjaFlex sleeve, but the holes are 15.9mm in diameter and should be compatible with the more common self aligning bushings. I've found the larger size of the extruder makes it more prone to binding than the original design, at least with the 30mm graphite bushings I'm using. With the original extruder, I was able to slide two 30mm bearings into a single 60mm NinjaFlex sleeve. With this extruder the bushings are further apart and I'm using short 10mm NinjaFlex sleeves (instead of 30mm) to reduce binding. Extruder Fan I mounted the extruder fan with 3mm cylindrical magnets, black oxide set screws, and a NinjaFlex gasket. The set screws go in the extruder holes, the magnets press fit in the fan screw holes, and the gasket prevents it from rattling. This makes it very easy to remove, but you can use the standard approach of attaching the fan with some M3 screws. Cooling Fans The extruder uses two 50mm x 15mm blower fans for part cooling. I'm using removable glue dots to keep them in place. I rarely run them at 100% (usually only for bridging or very short layer times). Typical values I use are 60-80% for PLA, 0-20% for ABS. Cooling Duct The cooling duct is attached using eight M4x3mm black oxide set screws and eight 5mm x 3mm cylindrical magnets. The set screws are screwed into the duct and extruder plastic, and the magnets hold them together (see pictures). Some other sizes can work too as there is some adjustment range with the set screws. Lights (optional) I'm using two 2W 12V LED modules wired in series (I'm running a 24V system) to light up the extruder. I have them wired on a separate circuit and set up to indicate when the hotend is hot enough to extrude. Brass M3 Press Fit Inserts The holes on top of the extruder are designed to work with brass press fit threaded inserts. Printing I printed the extruder block in PETG and the cooling duct in ABS. I would recommend printing in the default orientation with support. It can be printed on the back corner flat without support (it was originally designed to be printed that way), but I found that the axes were less orthogonal when printed that way (this design is prone to warping and not very tolerant of it). Wiring I wired the heater and thermistor on a separate connector from the fans and lights. This makes it easier to switch out just the heater block.
- 0 inches x 0 inches x 0 inches
- this product is 3D printed
- 16 available colors
- material is a strong plastic
- free delivery by May 02
- 0 parts