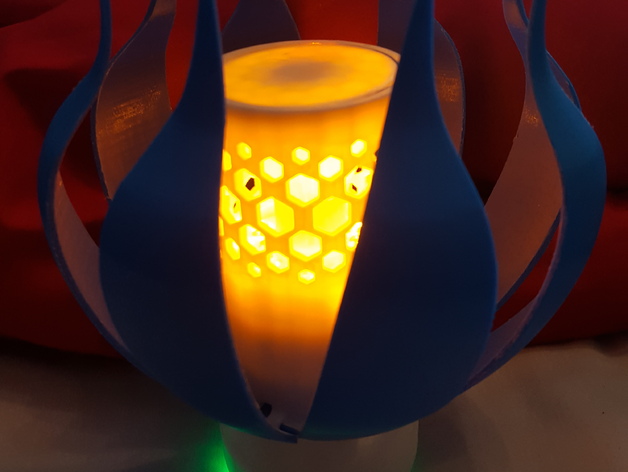
This Garden Torch is perfect for those long warm summer nights and is an Ideal replacement for the traditional paraffin garden torch. Using super bight LEDs, this torch simulates a natural flame and provides great ambiance at parties. Recent Updates: • Base.stl & Base.x3g updated to include reset button guard as the green led makes the two buttons look black at night • Petal.stl & Petal.x3g updated to make the width of the tab a tighter tolerance • Plunger.stl & Plunger.x3g updated to make the closing petals tighter and to make the open distance the same I have included in the files the electronic schematic and a parts list of everything I used and where I got it from to allow people to easily recreate this wonderful design.To make this design you will need the following tools: • 1.5mm/1.8mm Drill Bit • 2mm Drill Bit • Sandpaper • Various sizes of files • Wire Cutters • Wire Strippers • Heat-Shrink • Soldering Iron & Solder • Needle nose pliars • 4x M2,5x8 Screws Printed Parts Required (most parts need supports and will need to be trimmed and sanded down): • 1x Body • 1x Base • 1x Plunger • 1x LED Ring • 1x Cone • 1x Isolator • 8x Petals Assembly: 1) Take the base and install the 9V battery holder, the switches and power LED. Solder them together following the schematic but leave the connector J2 off but leave enough wire to solder this later. 2) Take the LED ring and insert the LEDs into the holes making sure the cathode faces the center point of the disk. as the Isolator is designed to go over these pins. 3) Solder all the Anodes in a circular pattern as shown in the pictures and attach a red wire to the ring. (a PCB will be designed to replace this task as it can become complex) 4) Mount the transistor driver chip on the veroboard, the size of the veroboard must be maximum width of 20mm (again a PCB will be created to replace this step. 5) Wire the veroboard for the arduino before the chip is attached as the arduino width is the maximum of 20mm. 6) Attach the servo motor to the diaphragm inside the body in the designated cutout as shown in the pictures. The servo arm Must be in the middle of the servo operation. 7) Insert the plunger into the bottom of the body making sure the servo motor arn goes into the specified groove. (it only goes in one way) 8) Connect the servo motor to the arduino connector and pass the wires from the arduino through the hole on the body and plunger and slide the LED ring and cone into place, The wiring might need to be adjusted using a long screwdriver or pliers so that it does not obstruct the servo arm and so that the led ring sits on the ledge in the body (the cone will be flat with the top of the cylinder. 9) Cut the wires and attach the connector to the wires passed through in the previous step. these need to be made as short as possible but long enough to be able to unplug it. 10) The wires in the base need to be cut short as well but long enough to again connect it to the wires in the last step. 11) Using the programming leads, program the arduino with the software, the positions of the servo motor can be adjusted in variables at the cop of the code. 12) Attach the base to the body using the screws. 13) Attach the petals using the 1.75mm filament as hinges (or another similar sized part). The petals may require sanding after the supports are broken off and to ensure all 8 close correctly. 14) Test the operation of the servo motor, you shouldn't hear the motor straining, the petals should close completely and open enough to see the body. If need be adjust the servo positions in the code and re-download to the arduino and test again.

