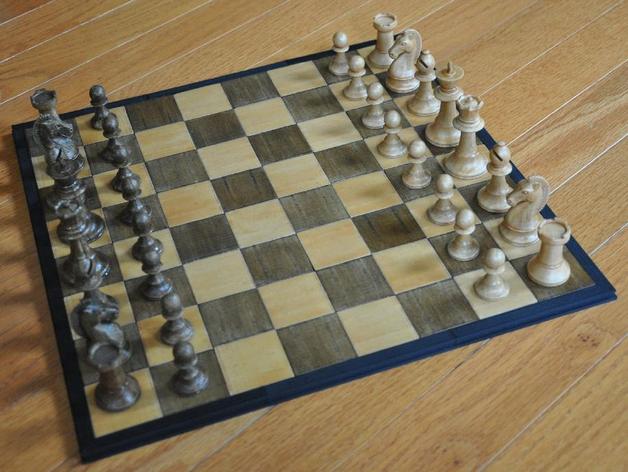
A chess board designed for (reasonably) easy printing and assembly using a hole-and-filament-peg method. Assembled board is 34 cm x 34 cm (13 x 13 inches). Designed especially to go with my OpenSCAD Chess set http://www.thingiverse.com/thing:585218 Update, August 22, 2015: Entered the chess set at the Montgomery County, Maryland Agricultural Fair under the category "Crafts: handmade toys and games", and won first place! Perhaps one day they will have a category "Crafts: 3D printed". . .Print one piece base_plate_center and four copies each of base_plate_edge and base_plate_corner. Assemble by inserting 1.75mm filament into each hole on the side, and cutting it to a length of 2-3mm. The filament then becomes pegs to hold the base pieces together. Apply solvent glue and press the pieces together with a clamp. Assemble first into three separate rows, and then bond the rows together to make the completed board base. Add filament pegs to all the holes on top, cutting the filament to a length of about 1-1.5mm. Keep the distance even by using a small allen wrench or toothpick to keep your wire cutters positioned at an exact and repeatable height above the board when you make each cut. Print 64 pieces of board_tile, 32 each of two different colors. Put solvent glue on the backside of each tile, and place on the board, using a clamp or mallet to drive the tile down on the pegs. The photos show the board printed with the base done in black PLA, and the tiles done in wood filament, stained and finished dark and light. To get the wood filament to look more like real wood, I printed all the tiles standing on edge, 8 to 16 at a time positioned close together in a row, looking like a heat sink. I printed on a raft to keep the tiles firmly attached to the bed while printing. Printing on edge makes the layers form a wood-grain pattern on the tile surface, with all the layers going in the same direction and no obvious 3D-printing artifacts like a crosshatch pattern or border showing on the surface. I needed to print two perimeters, or else the infill pattern shows through on the surface when stained. Tiles were sanded thoroughly, then given two coats of stain, followed by a gloss coat, and finished by lightly sanding with fine steel wool. All finishing work on the tiles was done before final assembly.
- 0 inches x 0 inches x 0 inches
- this product is 3D printed
- 16 available colors
- material is a strong plastic
- free delivery by May 06
- 0 parts